Installing bed tubs will create additional room to mount wide rims and fat tires onto the rear of your pickup.
Images and text by Steve Stillwell
When I made plans to build my 1956 Ford F-100 I immediately knew that I wanted to have it roll on a combination of 18-inch front wheels and 20-inch billet wheels for the rear. I wasn’t targeting the pro-street look, but wanted a minimum of a 20 x 10 inch rim for the rear, which a couple of buddies told me was impossible to do on an F-100. I was now inspired even more to prove it could be done, without having rubber sticking outside the rear fender lips. After all, you cannot have any suspension travel if the tires are about to hit the fenders, and I was also going to slam this truck’s ride height to the ground!
As you can see from the photos, I opted to pre-assemble this truck using a cut-up cab that the guys had in the R&D shop at Total Cost Involved, the manufacturer of the custom chassis. My son Cory and I assembled the bed and placed the proto type cab in place. We hung the bedsides onto the beds cross braces as well as brand new steel fenders. The tires, rear end width and bed sides were fighting for the same space as it just didn’t fit. At least not the way I wanted it to.
The resolve. Dan Carpenter Specialties manufactures inner fender bed tubs specifically designed to create additional rear tire clearance for old Ford trucks. These are available in 2 ¾ or 4-inch widths. Carpenter’s main business is complete replacement beds for classic Ford trucks, and the sides can be ordered with the tubs installed if you really wish to simplify life. I had a new Pro’s Pick bed, so my best option was to order and install Dan’s bed tubs.
The standard width of the stock 1956 Ford F-100 rear end housing is 60 inches wide, axle flange to axle flange. I opted to have Currie Enterprises, the rear end manufacture for this project, make the rear housing 57 inches wide which made room for the 10-inch wide Colorado Custom billet wheels, specially manufactured to simulate the old steelie look, but in 20 inches! The interesting point is 17-plus inches of room between the frame rails and fender lips. Plenty of room, however the bed wood was now in the way. Several modifications were going to be made to accept these fat billet wheels including trimming
two bed boards down to the width of the frame rails and installing the inner fender bed tubs.
With plenty of room for the rear tires, the TCI chassis, equipped with ShockWaves (air suspension), can now lay the running boards flush with the ground – even with 20 inch wheels! Follow along as we should you how to perform the bed tub installation.-SS
Parts Source list
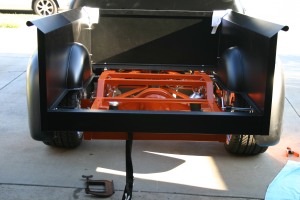
1-My 1956 Ford F-100 was looking so good without bed wood that I actually drove it for a year with the rear end showing. You can see just how fat the rear tires are, spread over the width of the Colorado Custom 10-inch wide billet wheels. The installation of Dan Carpenter bed tubs was necessary to create the needed space between the frame rails and rear fender lips.

2-Measure once, measure twice, marks the area to be removed from the bed and measure and mark once more just to be sure. If you have doubts about where to cut, contact Dan Carpenter Specialties for additional information. The material where the wheel tubs will be installed is then removed using a jig saw as shown in the image. Thanks to Dale Beverly and members of Pickups Limited for help this day.

3-To permanently attach the Dan Carpenter bed tubs to the bed sides, we began by marking where attachment welds would be made through drilled holes, such as this one in the very corner and edge.
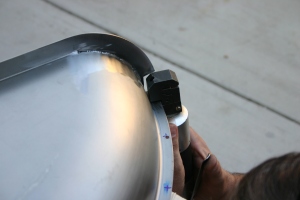
4- A metal air punch was the ideal tool to make clean holes in the bed tubs where we had previously spaced them appropriately around the circumference of the wheel tubs arch. You can also use a drill for this job.

5-Again, you cannot be too careful when placing the bed tubs properly in the area to be welded. It is easier to mark and check you measurements several times than it is to redo them. Dale marks the location of the holes in preparation of removing the bed side’s primer.
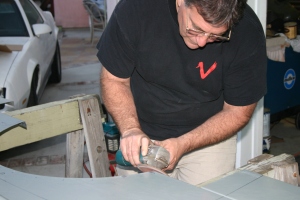
6- Now it is time to remove the heavy primer only from the spots where the bed tubs will be permanently welded to the bed sides. A course grinder does this job quickly.

7- Dale used a TIG welder with the least amount of heat to prevent the bed sides from warping from the heat. One drilled hole would be filled, then one a distance away was next to allow the metal to cool evenly without warping. No problems with the TIG method of welding for this job.

8- We took a lot of extra time to ensure we measured, marked and welded the inner bed tubs in the proper position into the bed sides. I highly suggest you mark the outside and front of the bed just to make sure you have the right tub on the correct bed side as shown.
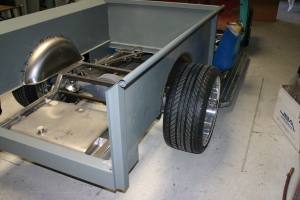
9-The big test was next as we hauled the bedsides now fit with bed tubs back to Total Cost Involved for a test fit to ensure the fat tires and 10 inch wide billet rims would clear the bed with the suspension all the way down. The fit was perfect without the insides of the bed being compromised.

10-The cool part about all this welding is that it is hidden by the fenders, so the spot welds do not have to be ground. As you can see, the tires will clear the tubs even when the rear end articulates, such as when you drive diagonally across a drive way ramp, such as at a gas station.
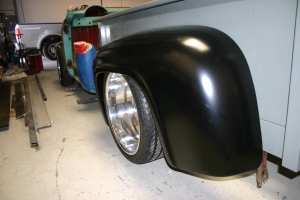
11- Now for the final test, the stock width steel rear fender was installed onto the bed side with the big wheels and tires in place. The fit was perfect even with the suspension aired all the way down.

12- With the fenders clamped into place, I then took a look underneath the truck. I was surprised to see just how low the chassis was to the ground and how much room there was between the inside of the tire and the chassis. You guessed it; I opted for even fatter rear tires at this point!

13-With the bed now fit perfectly to the chassis and the wheel/tire package properly fit to the bed by using Dan Carpenter Specialties bed tubs for an additional 4-inches of clearance, this step is done. As you can see, there is another article in the making to show you how the bed wood was installed seamlessly over that huge step in the rear frame rails.

